My Equipment
Astrophotography equipment used in personal setup
The personal equipment I have started to use is the average variety and often used by many astrophotography users. After a lot of research and formulation of the plan to do the types of imaging I wanted, I settled on the following setup.
I think there is a lot of research that can be done in this area of equipment, and just like the research that is put into the elements you plan to image, the decisions you make on equipment are a personal choice, and can vary drastically. There is no one size fits all when it comes to equipment in deep space photography.
Just like everyone, there are parameters you have to live with that revolve around your equipment and decisions.
There are other factors such as your location and where you intend to shoot from, portability, and other decisions that make the equipment stage of gathering important.
When I started, which wasn’t that long ago at all, I dragged the EQ6R out and used a 70mm quadruplet. Soon I jumped to an 8″ SCT and Hyperstar and now to a 8″ RASA and the 8″ SCT for visual and deeper imaging. As all astrophotography, equipment has evolved.
Soon I built a home-made pier and 10’x10′ deck for my permanent setup. Power and ethernet were run to the pier for long term usage. I then purchased a 2nd hand NexDome with full shutter and rotation automation and now the dome is fully automated with a Windows computer and remote desktop running NINA. The ability to open, close and protect equipment without setup has greatly increased how much imaging can be done in a session or a weeks worth of hit and miss weather.
Lately I have upgraded to an iOptron CEM 120 with encoder on the RA axis to handle the payload of the larger RASA 11. I was running the RASA 11 overloaded on a EQ6R with 50lbs of counterweight, and it did surprisingly well… but the CEM 120 was a much needed upgrade.
After a few months of dragging equipment in and out, the dome was constructed on a 10×10 deck with a dedicated pier using 1000lbs of concrete. Dedicated power and ethernet for networking provide plenty of power and networking. The pier was constructed and welded as a home-made design along with a $20 dollar disc brake for pier mount and the EQ6R.
The NexDome was then placed with 2 rooms, complete with flooring, lighting, dehumidifier, and dedicated windows 10 computer to power NINA and the entire configuration. Wifi power systems were provided to enable remote on/off capabilities. AAG Cloudwatcher with full wind, cloud, rain, barometer provide protection to the automated dome.
The entire observatory has automated power shutter and 360 rotation and easily connects and slews with the scope throughout the night.
After much time on an EQ6R, it was time to upgrade for heavier payloads. The RASA 11 alone is about 40+lbs in weight, and while it did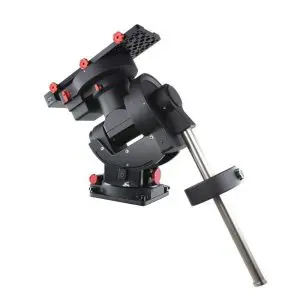
Likes & Dislikes
This mount is quite impressive with it’s payload capability of 115lbs + double that with counter weight. The likes are pretty large, it offers full internal cabling which is great to lessen the chance of cable tugs. 4 USB 2.0 and 1 USB 3.0 is perfect for my personal setup. I can even power several dew straps off the mounts cabling. I also like that it has polar scope options such as ipolar or polemaster to fit in it, though not a requirement.
I love that it has Ethernet and WiFi built in. I have skipped the USB cabling for the more reliable ethernet connections. One fault I found was the powering on the accessories does require 10amps and I had a faulty or low powered system, upgrading it to a solid 10amp power dedicated to just accessories solved all my issues.
The mount I use is one of the most popular on the market… and for good reason. It has great reviews for tracking capabilities, for accuracy, and for overall stability with heavy weight. While my deep field astro imaging setup is not heavy and this mount may be
considered overkill, I also chose it because it is scalable for future visual usage and or use with heavier reflector or cassegrain scopes.
Likes & Dislikes
The package for this mount is pretty comprehensive, I like the fact that it comes with polar scope, couple of weights, and offers out of the box performance. I also like that the newer ones offer a full head USB port, while I know some older models did not offer this and could be run through the hand held unit or through the use of special EqMod cables to the guide port.
Its main drawback is it’s weight, and it’s a heavy sucker when loaded up to move around. I also don’t like the declination screw, but it could be resolved by replacing it.
Overall the mount is popular with a lot of folks for good reason, it’s mid-ranged price and performance let you grow into it, and provides a very stable solid platform for both visual or astro imaging users.
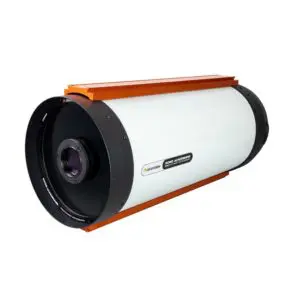 Celestron RASA 11″ f/2.2 OTA
The Celestron RASA 11″ is the newest scope that I have owned and provides very quick imaging at f/2.2 and a wide field of view. It provides a little more reach than the RASA 8″ I own, but more importantly it does offer some much needed backfocus spacing for rotators, tilters, and other optical train accessories.
Likes & Dislikes
Love the speed of these scopes, wide field angle they can reach, and with the RASA 11 I get a much longer optical train of 72.8mm. Now I can fit a rotator, tilter, and other tools like a filter slider without fighting for every millimeter of spacing. Probably only dislike on this scope is it’s 45 lbs and maxing out my current EQ6R mount. Works, but just need a better mount some day.
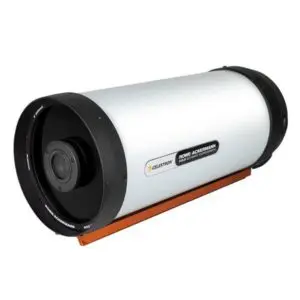 Celestron RASA 8″ f/2 OTA
The celestron RASA is the newest OTA and is extremely capable scope with f/2 capabilities. The super fast light collection pairs well with a 1600mm camera and filter slider. The Baader f/2 ultra-highspeed 3.5/4nm filters also compliment the scope for super fast, precise light and very little light pollution in the bortle 3-4 skies where I observe from. The RASA is a drastic improvement over the 8″ edge hd with Hyperstar in that there is very little tilt and collimation is not as picky as with the Hyperstar.
Likes & Dislikes
This scope is fast, and I have very little dislikes on the system… other than short backfocus. It provides crisp flat images edge to edge, does accept a filter slider and mono camera, though short backfocus limits this to specific cameras which is my only complaint.
This scope is my go to scope now with a large aperture that allows for a variety of focal lengths. It’s one of the most versatile scopes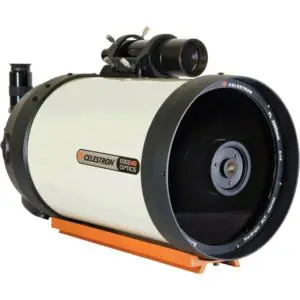
Likes & Dislikes
This scope is versatile. Not quite as good at fast f/1.9 as say a purpose built RASA but it does a very good job at the mid-length focal length of 1422mm. I can zoom in on targets such as Rosette, Orion, or Eagle and still not overshoot most of the large nebula that I like to target. It also offers some visual capabilities which can be fun at times, but with imaging as my main pursuit, it offers essentially 3 scopes in one. My only dislike is that HyperStar is finnicky and takes a lot of patience and precise setup to achieve, while a purpose built RASA would be much more point and shoot for f/2 imaging.
So the first scope I chose after research was up in the air. I was keen on getting a William Optics to begin with, but then decided on the Meade 70mm for a few reasons. It had really good reviews, could be found on discount in a few places if looking hard enough, and it also provided a better FOV for wide field deep space imaging I wanted to start with.
Likes & Dislikes
The scope is a fast f/5 focal ratio which I liked and it also is a quad, so no need for a flattener add-on. When combined with the scope + flattener of other scopes, it was pretty equivalent in pricing and removes some hassle from optical setup. A dislike is it can’t be used visually, but with no intention of using it for that purpose, it fit the bill for a good clear crisp wide field scope. It has a normal 55mm back focus for my camera setup, fast focal ratio, and also came with a nice aluminum case.
Hyperstar is one of those wish list items I wanted and allows super fast f/2 imaging with my Celestron Edge HD at a focal length of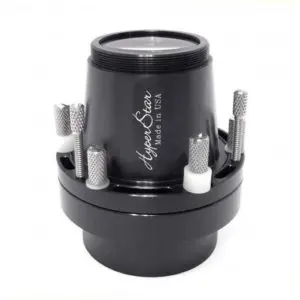
Likes & Dislikes
The like on this system is that it turns a faststar compatible scope into a versatile system. An SCT can now run a variety of focal lengths which is great. The problem with Hyperstar is that you deal with collimation issues, tilt issues, and focus issues that you need to be spot on for to get coma free imaging… you’ve been warned.
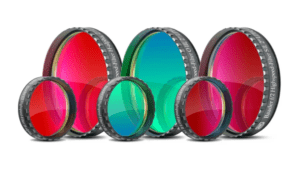
Without a doubt these filters have become a game changer for the fast astrophotography imaging done on the RASA’s. These Astronomik filters are impressive with zero haloing and a good bandwidth for the bortle 3-4 skies we use. We like them so much we partnered with Astronomik!
Likes & Dislikes
There is nothing not to like, these filters are thin at 1mm thick, but they are fairly robust and resilient with very good quality images. Outside of the price, they are fabulous and highly recommended filters.
Likes & Dislikes
These filters are the best filters I have used. I went from the older Baader f/2 filters to the newer 3.5nm/4nm ultra-highspeed and the performance is measurably better. Images are super clear, halos on Oiii are much less, and I have zero dislikes so far with these filters.
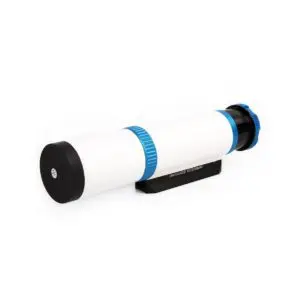
The goal with my guide scope was to get clear crisp stars for electronic guiding, nothing more. No visual usage is needed for my situation and I wanted a proven choice. Also, I did not want the cluster of having scope rings and the cleaner style of a dovetail shoe on the scope which the Meade 6000 comes with.
Likes & Dislikes
I chose William Optics because of the integrated rail and also for the unique locking system to engage the rear ASI 120mm mini guide scope. It uses a roto-lock system which means no threaded in stopper screws that will eventually weaken or get stripped threads.
The ASI 6200mm camera is a full-frame camera with 16 bit technology. This little camera is impressive with huge file size images and large FOV platform. Smallish pixels at 3.76um makes it a good combination to use with a RASA 11 platform if you can tame the tilting,
Likes & Dislikes
I like the 6200mm for it’s full frame size. After using the 1600mm for quite a while, I enjoy not having to stitch together mosaics to achieve the same effect. I feel the contrast and sharpness are a bit better with 16-bit as well. I also enjoy the short backfocus length it offers with a removable tilt plate. Using the Photon Cage, we can remove that 5mm plate and replace it with our cage system and not lose any backfocus.
With the large full frame comes the challenge of taming the tilt and vignetting on such a large sensor. I noticed my 6200mm does have quite a bit of tilt in the camera system itself, but easily adjusted in our own ASG cage. The other drawback on this camera is the file size, hitting 120Mb is huge when you take fast images like a RASA does.
The camera is one place where the money goes, so along with a mount, link in the chain of my setup was one spot I focused on and researched as well. Monochrome camera vs RGB color Camera? With monochrome binning being 4x that of color, I was set on doing monochrome with filter wheels. The convenience of color is nice, but with Nebulae and deep solar imaging, I wanted the extra benefit of the monochrome.
The 1600mm is also proven, it has a lot of users, with good reviews, and is also compatible across the EFW filter wheel, ASIair pro computer system, and guiding system.
Likes & Dislikes
I like the 1600mm camera because of it’s compatibility across all ASI products and their computer system. While I did mess around with Astro Photography Tool and PHD2 directly to guide, I prefer the software integration provided by a full system like the ASIair. The camera provides 256mb of DDR3 buffering, which coming from the computer world is great. I still do have amp glow on the images, so it doesn’t remove it as documentation insists it would do, but it certainly wouldn’t hurt.
The camera has a full cooling system, 16.4Mp image, and I also like the 4:3 layout provided rather than square format of some of the similar cameras. Pixel sizes are down to 3.8 microns for fine detail and low read noise is 3.6e.
I also attached their EFW 3 position filter wheel to make the entire system automated. I have it loaded with the LRGB filters as well as narrow band Ha, Oiii, Sii filters. I also have a dark filter in 8th position for automated darks at end of imaging session.
In all, this system is proven, compatible, expensive, but also a good mesh with what my scope, mount, and other tooling are setup to accomplish.
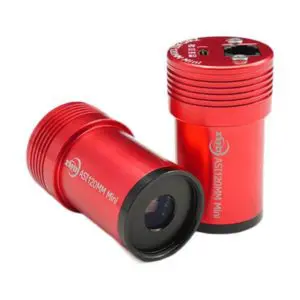
The 290mm mini guide camera is a step up from the 120mm mini I had been using, and I have to say it is a great improvement in picture SNR and guiding. With the new PHD2 multistar guiding at this point in time, the 120mm was struggling to select multipel stars. With the 290mm my multistar guiding is spot on every time.
Likes & Dislikes
The best part of the 290mm guide camera is it’s portability. I can slide this into any 1.25″ finder and use it for guide scoping, OAG guiding, and it works great with software from ASIair PRO for multi-star guiding, or just with PHD2 and guiding on it’s own. I have used this in both OAG and Guide Scope modes and works much better than the 120mm mini for precise multistar guiding.
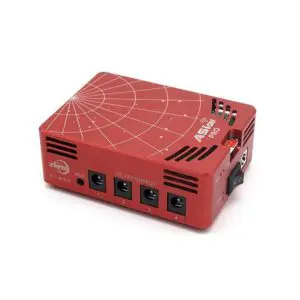
The one component I like as a luxury is the ASIair Pro computer for controlling wire management, power output, and camera/fitler wheel control. While I also tested out standard tools like Astro Photography Tool and PHD2 guiding directly from my laptop, and they are highly more configurable for sure, this ASIair computer is well worth it for automation and integration.
Likes & Dislikes
One aspect I love is that it integrates completely across your entire imaging system. A downfall is you need full ASI equipment and cameras to make it compatible, but that is understandable coming from the software industry. Better to have a working production system when standards are fairly up in the air across other devices than fall short with a conceptual product that doesn’t work well or introduces complexity and bugs.
So far this device works exceptionally well in automating my polar alignments, focusing duties, tracking, image processing and automation. The one great aspect I love about it is the quick polar alignment, plate solving, and the ability to also guide using SkySafari Plus or Pro. While all imaging must take place in this software, the ability to jump out and connect my phone, tablet or computer to other apps for actual moving and mount duties is very cool. I have had great luck using wireless range extenders to connect to my home network along with SkySafari to move and find objects of interest before photographing and moving into the dedicated ASIair Pro software for image duties.
Another great aspect is the onboard power ports and USB ports, so wire management becomes super clean with a tool like this. I created a csutom mount for my scope that allows it to be bolted directly to the scope along with a range extender to essentially provide very few cables but a full computer driven, wifi-range extended network to my scope, mount, camera, guider, and filter wheel.